If you’re using Windows Media Center, you will have come across the fact that you can’t record directly to network storage (without using iSCSI anyway). Since I put together a home server, I was thinking through how I could set my system up to move my recordings over to my network storage. Then I remembered that the Windows Task Scheduler can be driven by events. So in the end it was ludicrously simple:
Create a Scheduled Task with an event trigger.
Note: these steps only verified on my own system running Windows 7. Your mileage may vary.
On the Server, create a share and/or path for your recorded TV. Make sure there are permissions an account to write into this location.
On the Media Center machine, open the Computer Management console (right-click Computer, Manage) and then navigate to /System Tools/Task Scheduler. Expand the Task Scheduler in the tree on the left then select the Task Scheduler library by double-clicking on it in the tree control.
In the Actions panel on the right, choose New Folder. Name your folder something descriptive like “Move Recordings Task”. Click OK.
Open the new folder in the tree on the left.
In the Actions pane, select “Create Basic Task…” to start the Wizard.
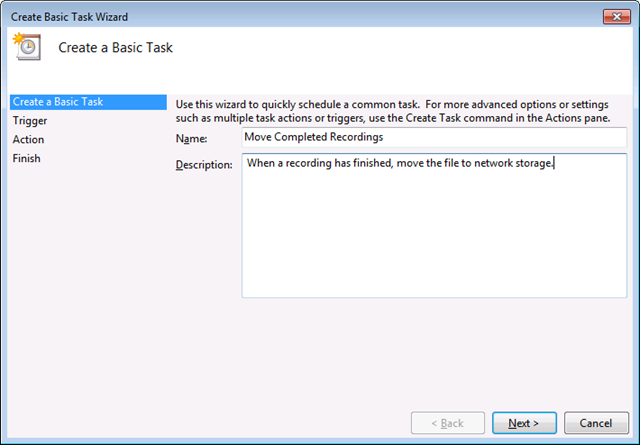
Name the Task and optionally give it a description. Click Next.
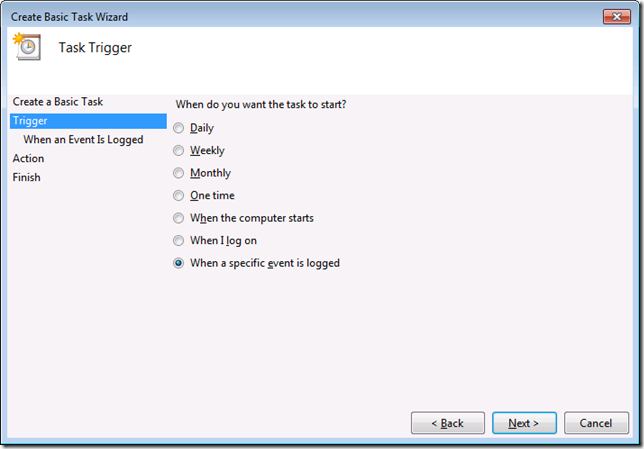
In the “Task Trigger” step, select “When a specific event is logged”. Click Next.
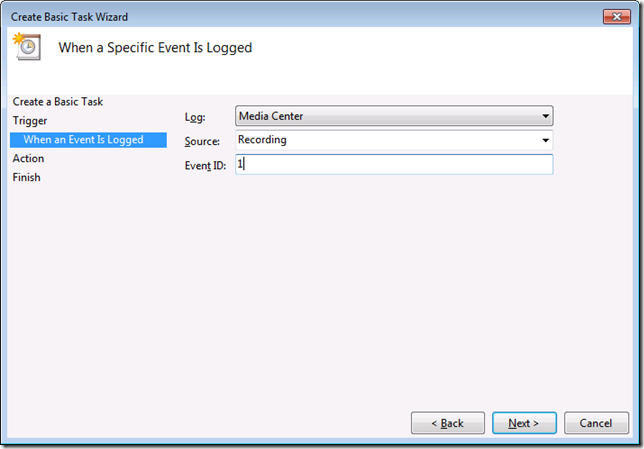
In “When a Specific Event Is Logged”, select Log = Media Center; Source = Recording; Event ID = 1 (type this). Click Next.
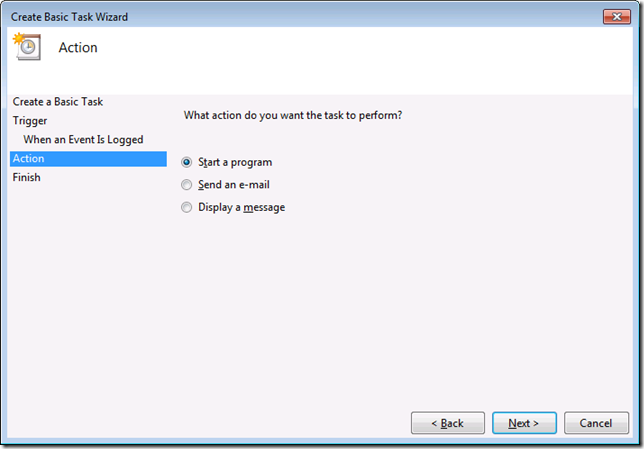
In “Start a Program”, set the program/script to the path to Robocopy on your system. This should be in your Windows\System32 directory.
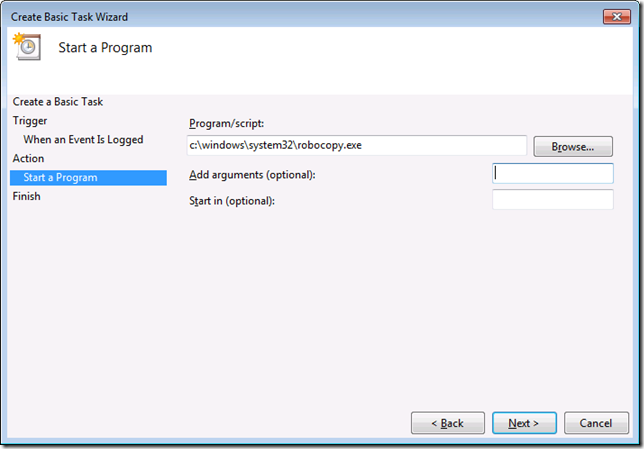
In the “Add arguments (optional):” text box add the following, customized to your environment and configuration:\
"C:\Users\Public\Recorded TV" "\\networkServer\RecordedTVShare" *.wtv /MIN:5000000 /MOVE /R:0 /w:0 /NP /NFL /NJH /NJS\
Where [“C:\Users\Public\Recorded TV” is the local recording directory, “\\networkServer\RecordedTVShare” is the path to the network storage you are using. The other arguments tell robocopy to delete the files locally after copying (/MOVE), not to retry if there is an error (/R:0) and not to generate status messages (/NP etc). The no retry argument is critical, because if you have multiple tuners and recordings, you want the recording to finish before moving the file.
Click Next.][In the “Summary” step, check “Open the Properties dialog…” then click Finish.
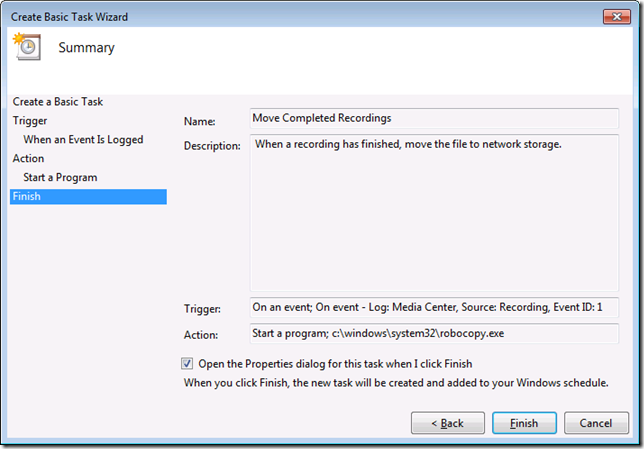 ]
][In the properties window, select the “Triggers” tab then click the “New…” button. Repeat the info from steps 7 and 8, but modify the Event ID to 3, to capture the manually stopped recordings event if you wish.]
You may need to enter credentials for an account to run this task as. Enter the appropriate username and password of an account with local and network access, specifically write access to the server share.
[Lastly, add the network location to your Media Center’s Recorded TV location list.]
